
Blog
iPad Repair Process Explained: Fix It Right in Southview
iPad repair process explained for Southview: intake, diagnostics, repair, QA, and warranty-backed handoff from TechBrotherz. Get clear, same-day friendly guidance.
iPad repair refers to a standardized, step-by-step workflow that finds the fault, protects your data, and restores full function with tested parts. This iPad repair process explained in plain language covers intake, diagnostics, repair, quality checks, and a warranty-backed handoff. For Southview residents, knowing these steps helps you plan your day and choose confidently.
Key facts
- Published: June 22, 2026
- Last updated: October 2, 2026
- Reading time: 16 min read
- Questions about your own device: Call (403) 273-8324
Last updated
iPad Repair Process Explained: Fix It Right in Southview
Published by Imran Mohammed at TechBrotherz, the walk-in repair Store at 3317 17 Ave SE in Calgary. June 22, 2026, updated October 2, 2026.
No article on this site is paid for or sponsored. For a quote on your own device, call (403) 273-8324.
By Imran Mohammed — TechBrotherz | Last updated: 2026-06-22
Start Here: The iPad Repair Process at a Glance
The iPad repair process follows five core stages: intake, diagnostics, approval, repair, and post-repair QA. Expect clear checklists, data-safe handling, part-level fixes, and a documented handoff with a written warranty. This structure keeps timelines predictable and results consistent—especially helpful when you need your tablet back the same day.
Use this quick map to see where you are—and what’s next. We’ll outline each stage, the tests involved, and what you can do to speed things up at the counter.
- What the process is and why it matters
- Exact steps: from intake to warranty handoff
- Repair types (screen, battery, charge ports, cameras, logic)
- Best practices to protect your data and device
- Tools and parts quality: what to look for
- Local tips for Southview, near Valleyview Park Viewpoint
- FAQ: clear, direct answers
Quick Summary
A trustworthy iPad repair follows a documented flow: confirm the issue, run diagnostics, align on the plan, complete the fix with proper tools, then verify with multi-point tests. TechBrotherz adds a written 60‑day warranty so you leave with proof the repair meets shop standards.
- Expect a 10–12 point intake and diagnostics checklist for accuracy.
- Common front-glass or battery repairs are often same-day once parts are ready.
- Post-repair testing covers touch, display, battery, Wi‑Fi, audio, cameras, and sensors.
- Written coverage provides peace of mind for the first weeks of daily use.
What Is the iPad Repair Process?
The iPad repair process is a standardized series of steps to find the fault, isolate affected components, replace or rework parts, and verify performance. It protects your data, prevents new damage, and returns the tablet to reliable use with a documented warranty you can reference.
Think of it like a flight checklist: when each step is followed, outcomes become predictable. That matters when work, school, or family life hinges on a working iPad. At TechBrotherz, we apply the same process to iPad, Android tablets, and other devices to keep results consistent.
- Intake and protection: device labeling, case photos, and a quick function snapshot (power, touch, charge).
- Diagnostics: software and hardware checks to pinpoint the root cause (not just the symptom).
- Repair: safe disassembly, part replacement, or micro-solder work as needed to restore function.
- Quality assurance: multi-point post-repair tests to confirm full function under normal use.
- Handoff + warranty: a clear summary of work performed and coverage terms you can rely on.
In our experience serving Southview, most issues trace to a handful of categories: impact damage, liquid exposure, charge failures, and wear on buttons or batteries. A structured approach reduces repeat visits by addressing root causes, not just symptoms. For related device types, see our tablet repair overview and the dedicated iPad repair page.
Why the Process Matters
A proven repair process reduces data risk, shortens turnaround, and improves reliability. For busy Southview families and students, that means fewer surprises, same-day fixes when possible, and confidence backed by a written warranty from a neighborhood shop you can revisit.
Here’s why it makes a real difference and how it changes your experience from drop-off to pickup.
- Data safety: Proper handling avoids unintended resets or data loss. Backups add a second layer of protection.
- Predictable timelines: Checklists keep steps tight; common screen or battery jobs are often same-day.
- Device longevity: Replacing worn parts (battery, charge port) can extend usable life by years.
- Warranty support: Written coverage (60 days at TechBrotherz) gives you a safety net if anything feels off.
- Fair decisions: Clear diagnostics help you choose repair over replacement when it makes sense.
We’ve found that consistent QA cuts post-repair issues dramatically. A standard 10+ point test catches small problems—like a misaligned camera gasket—before the device ever leaves the bench. If you’re comparing options, our cell phone repair team and computer technicians follow the same quality playbook.
How the iPad Repair Process Works at TechBrotherz
At TechBrotherz, iPad repairs move through five steps: greet and protect, diagnose, align on the plan, complete the fix with proper tools, then run multi-point QA before a documented handoff. Walk-ins are welcome, and most common issues are resolved the same day.
Step-by-step workflow
- Intake (5–10 minutes): Power-on test, exterior photos, note passcodes (if provided), and record reported symptoms. We label the device and case to keep everything together.
- Diagnostics (20–40 minutes): Touch grid test, battery health review, charge draw check, Wi‑Fi/Bluetooth, audio, cameras, sensors, and storage headroom for updates.
- Plan + approval: We explain the fault, the recommended fix, and any risks (such as adhesive reseal time) so you can decide confidently.
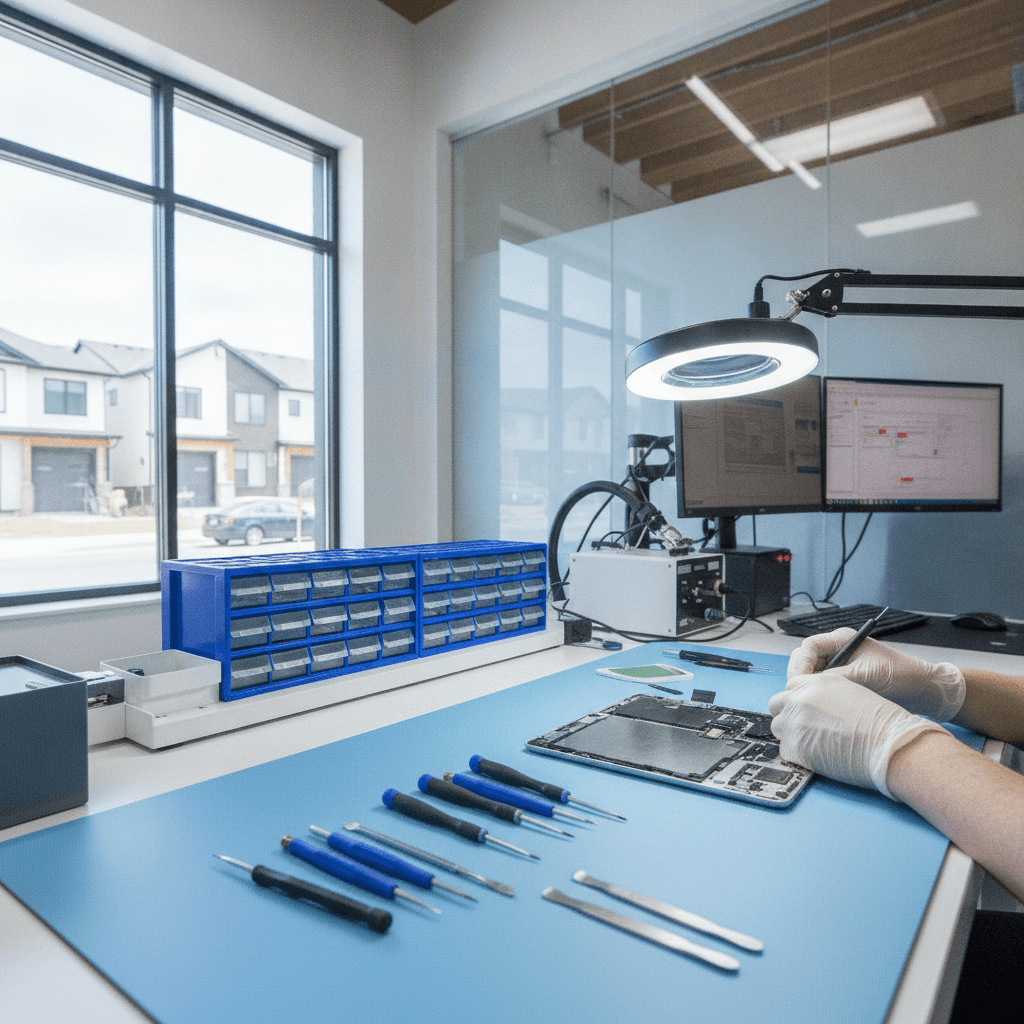
- Repair execution: ESD-safe bench, heat-controlled separation, adhesive management, connector care, and torque-appropriate reassembly. We log each major step.
- Quality assurance (15–25 minutes): Verify display uniformity, touch accuracy, charge speed, audio, mic, buttons, orientation, and a minimum two restart cycles.
- Handoff + warranty: You get a plain-English summary and written coverage for 60 days from TechBrotherz.
What we test—every time
- Power and boot sequence, with at least two restarts for stability
- Touch response across a 16–20 cell grid to catch dead zones or ghosting
- Display brightness, color uniformity, and a quick dead-pixel sweep
- Battery health indication and charge acceptance under typical current draw
- Wi‑Fi and Bluetooth connectivity with a speed sanity check
- Rear/front cameras, flash, microphones, speakers, and orientation sensor
Because walk-ins are welcome, we can often start diagnostics within minutes of arrival. If a part is unique or back-ordered, we’ll set expectations clearly and keep you updated. For Apple phones and Samsung devices, our iPhone repair and Samsung repair teams use the same intake and QA routines.
Types of iPad Repairs and Methods
Most iPad repairs fall into six categories: screen, battery, charge port, buttons, cameras, and board-level work. Each category uses specific tools and adhesives, with heat control and connector care being the two biggest factors in success and long-term reliability.
Common categories and how they’re handled
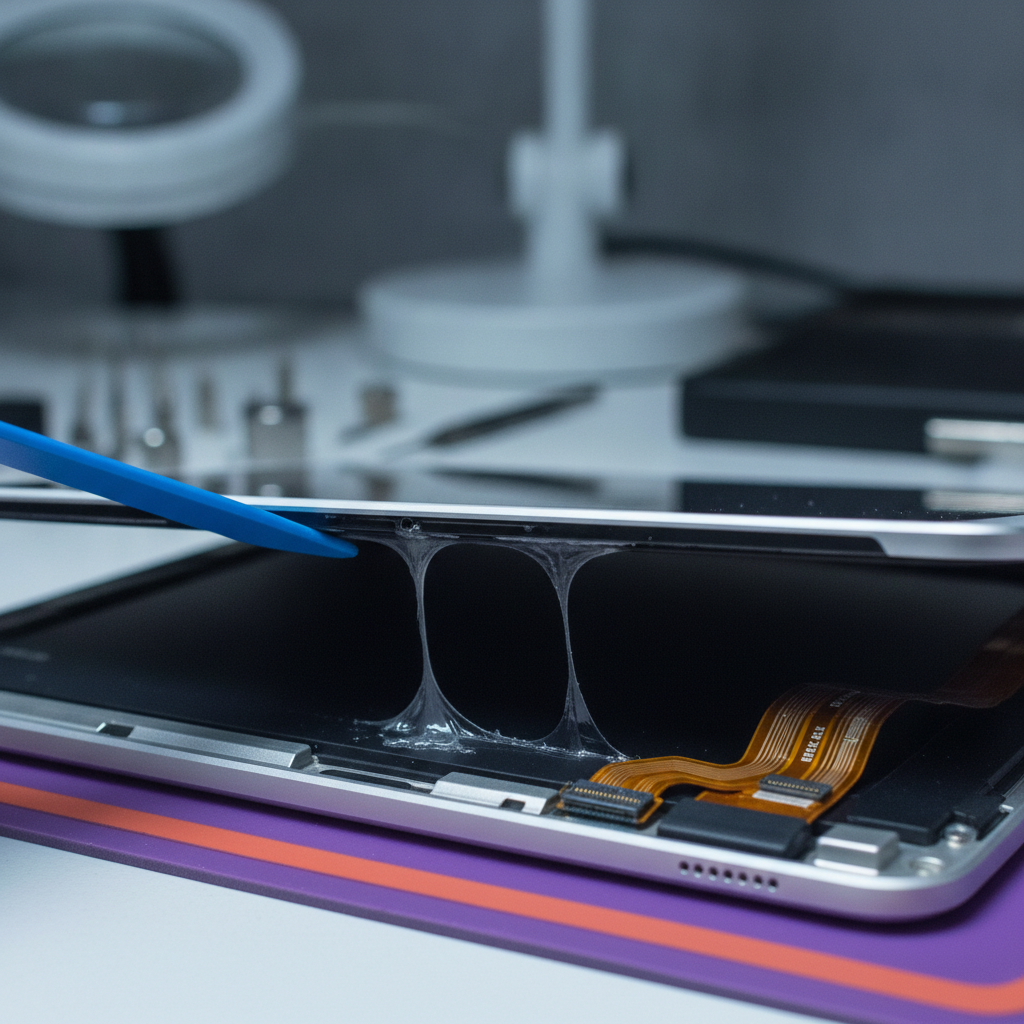
- Screen/digitizer: For cracked glass or dead touch zones; involves heat, separation, adhesive cleanup, and reseal. Proper clamping maintains uniform pressure during cure.
- Battery: For rapid drain or shutdowns; requires safe removal of strong adhesives and careful cable routing to prevent pinch points.
- Charge port: For intermittent charging; may be cleaned, reflowed, or replaced depending on wear and board layout.
- Buttons/switches: Power, volume, or home/Touch ID issues; alignment matters to avoid frame stress and premature wear.
- Cameras/sensors: Fixes for focus, dust, or cable faults; includes reseating seals to prevent future dust intrusion.
- Board-level: For no‑power or liquid damage; requires micro-solder skills, corrosion remediation, and extended QA.
Comparison: service options you can choose
| Option | Pros | Cons | Typical timeline | Best for |
|---|---|---|---|---|
| Local walk‑in | Same‑day potential, talk to a tech, warranty with a local face | Peak times can queue; part availability varies | Hours to a day | Cracked screens, batteries, ports |
| Mail‑in depot | Broad part inventory and specialized tooling | Shipping time, less personal communication | Days to a week | Less common models/issues |
| DIY | Hands‑on learning and control | Risk of damage; adhesives and cables are unforgiving | Half‑day to weekend | Experienced tinkerers only |
For most Southview residents, local walk‑in service offers the right balance of speed and accountability. The ability to ask questions face to face—and return if needed—adds real value. If you’re weighing tablet versus phone repairs, our cell phone service uses the same transparent approach.
Best Practices Before and After Repair
Back up your iPad, note your passcode, and remove accessories before service. After repair, avoid pressure on the display for 24 hours, monitor battery behavior for a few cycles, and keep your software current. These habits protect both the device and your data.
Before you visit
- Back up to iCloud or a computer; confirm the backup actually finished.
- Turn off Find My if requested after identity verification (it’s a security step).
- Remove cases, screen protectors, and SIMs to speed intake and reduce debris.
- Note recent behavior (e.g., shuts down at 30%, won’t charge past 70%). Specifics help.
- Charge to at least 30% so diagnostics and updates run smoothly.
After you pick up
- Treat adhesives gently for 24 hours; avoid tight bags or pressure on the display.
- Let a new battery settle over 3–5 charge cycles before judging endurance.
- Install the current iPadOS for stability and security patches.
- Re-test essentials: touch, cameras, Wi‑Fi, audio, FaceTime, and orientation.
Local considerations for Southview
- Plan a short walk to Valleyview Park Viewpoint while diagnostics run—most checks take under an hour.
- Winter drop-offs: extreme cold can make glass more brittle; use a padded sleeve for the walk.
- Studying at CLI College Calgary Campus? Ask for a quick charger check so class-time power is reliable.
If you manage multiple devices for family or small business, keep a simple log of symptoms and times. That context speeds triage for iPads, phones, and even PCs on our computer repair bench.
Tools and Resources We Trust
Quality iPad repairs rely on ESD-safe benches, proper heat control, plastic pry tools, OEM‑grade adhesives, and verified parts. Technicians pair these with reputable guides and device documentation to ensure accuracy and keep your data safe during hardware work.
- Anti‑static (ESD) mat and grounded wrist strap to protect boards during disassembly.
- Precision heat pads and temperature‑controlled hot air for safe glass separation.
- Plastic opening picks that won’t gouge frames or scratch flex cables.
- Magnification for connector inspection and dust control around camera modules.
- Device‑specific adhesives and frame clamps to ensure uniform pressure while curing.
For background on common tablet symptoms and fixability patterns, see this practical explainer on common tablet issues. For quick triage ideas you can try before heading in, this quick-fixes guide outlines simple checks that complement professional diagnostics.
Real-world Examples: Southview iPad Repairs
Three quick scenarios show how a standard process delivers consistent outcomes: a cracked display, a charge‑port failure, and liquid exposure. In each case, structured diagnostics, precise repair, and thorough QA prevented repeat issues and got people back to work or class.
Case 1: Cracked Glass on a School iPad
A Southview parent walked in after a drop. Touch worked, but glass was shattered.
- Diagnostics confirmed the digitizer was intact, LCD good, and no frame warp beyond spec.
- Heat-assisted separation, full adhesive cleanup, new assembly installed with uniform clamping.
- QA found a minor light-bleed; we reseated and re-clamped for a clean seal.
- The student left with a working iPad and a written 60‑day warranty.
Case 2: Charge Port Intermittent
Tablet would only charge if the cable was held at an angle—classic worn-contact symptoms.
- Port inspection showed lint and worn contacts; power draw measured below target.
- Deep clean failed; the port was replaced, and the area reinforced.
- Post-repair draw and a brief thermal check returned to expected ranges.
Case 3: Kitchen Spill
Device powered on but had random shutdowns after a spill.
- Board inspection revealed corrosion near a power IC and nearby passives.
- Ultrasonic cleaning and micro-solder remediation stabilized the affected line.
- Battery replaced due to exposure; device passed an extended QA cycle.
These patterns show up on phones and laptops too, which is why our iPhone team and PC bench use the same intake, diagnostics, and QA structure.
Need help fast? Walk in to TechBrotherz for same‑day diagnostics on most iPad issues. Prefer a heads‑up? Use our iPad repair page to describe symptoms so we can prep parts and streamline your visit.

iPad Repair Process FAQ
Most iPad repairs follow the same five stages and can be completed the same day for common issues. Back up first, share your passcode if comfortable, and expect a written warranty when you pick up. Here are clear answers to frequent questions from Southview customers.
How long does an iPad screen repair take?
Most front-glass or full display assemblies are completed the same day once parts are on hand. Intake and diagnostics often run under an hour, with post-repair QA adding 15–25 minutes to ensure touch accuracy, display uniformity, and a reliable reseal.
Will I lose my data during repair?
Data loss is uncommon during hardware repairs, but it’s smart to back up first. Technicians avoid resets unless required for diagnostics. If a reset becomes necessary, you’ll be informed and guided through restoring from your backup after pickup.
What should I do before I visit?
Back up your iPad, charge it to at least 30%, and remove accessories. Bring your passcode if you’re comfortable so techs can run complete tests. If you use Find My, be prepared to turn it off after identity verification if requested.
Do you work on all iPad models?
Yes—most iPad, iPad mini, iPad Air, and iPad Pro models are serviceable. Some parts vary by generation, so model identification helps us stock the right components and speed up your turnaround time.
Is DIY a good idea for cracked screens?
DIY is possible but risky due to strong adhesives and fragile flex cables. Without heat control and proper tools, it’s easy to damage display layers or sensors. For most people, a local, warranty-backed repair is the safer and faster route.
Key Takeaways
Choose a shop that follows a clear, five-stage process and backs work with a written warranty. Back up first, ask for diagnostics details, and verify post-repair tests before you leave. In Southview, a local walk‑in like TechBrotherz offers speed, accountability, and same‑day potential.
- Structured steps prevent surprises and protect data across devices.
- Diagnostics-first saves time and avoids repeat visits.
- Post-repair QA (15–25 minutes) is non‑negotiable for reliability.
- Local walk‑in service adds face‑to‑face accountability and convenience.
- Written 60‑day coverage provides peace of mind after pickup.
Conclusion and Next Steps
A reliable iPad repair is transparent, methodical, and warranty-backed. Back up, drop in, and expect diagnostics, a clear plan, precise repair work, and thorough QA. Southview residents can count on local, same‑day potential and an easy handoff when the job is done right.
Ready to get your iPad back on track? Walk in to TechBrotherz for fast diagnostics on tablets, or start on the iPad repair page so we can prepare parts ahead of your visit. If you also carry an Android tablet, our tablet repair team is ready.
Related pages
Rather just ask a person?
Call (403) 273-8324 and describe the problem, or walk in to 3317 17 Ave SE in Calgary. Every repair is quoted free before any work starts.