
Blog
Phone Repair Mistakes: Avoid Costly Damage in 2026
Avoid common smartphone repair mistakes with our Calgary guide: backups, ESD safety, testing, and when to trust a pro. Learn best practices and local tips.
Common smartphone repair mistakes are the preventable errors people make before, during, or after a fix—like skipping backups, using the wrong screwdriver, or prying near a battery—that lead to extra damage, data loss, or safety risks. In Southview, Calgary, TechBrotherz helps locals avoid these pitfalls with expert diagnostics, safe parts handling, and a 60-day repair warranty.
Key facts
- Published: July 7, 2026
- Last updated: October 2, 2026
- Reading time: 18 min read
- Questions about your own device: Call (403) 273-8324
Last updated
Phone Repair Mistakes: Avoid Costly Damage in 2026
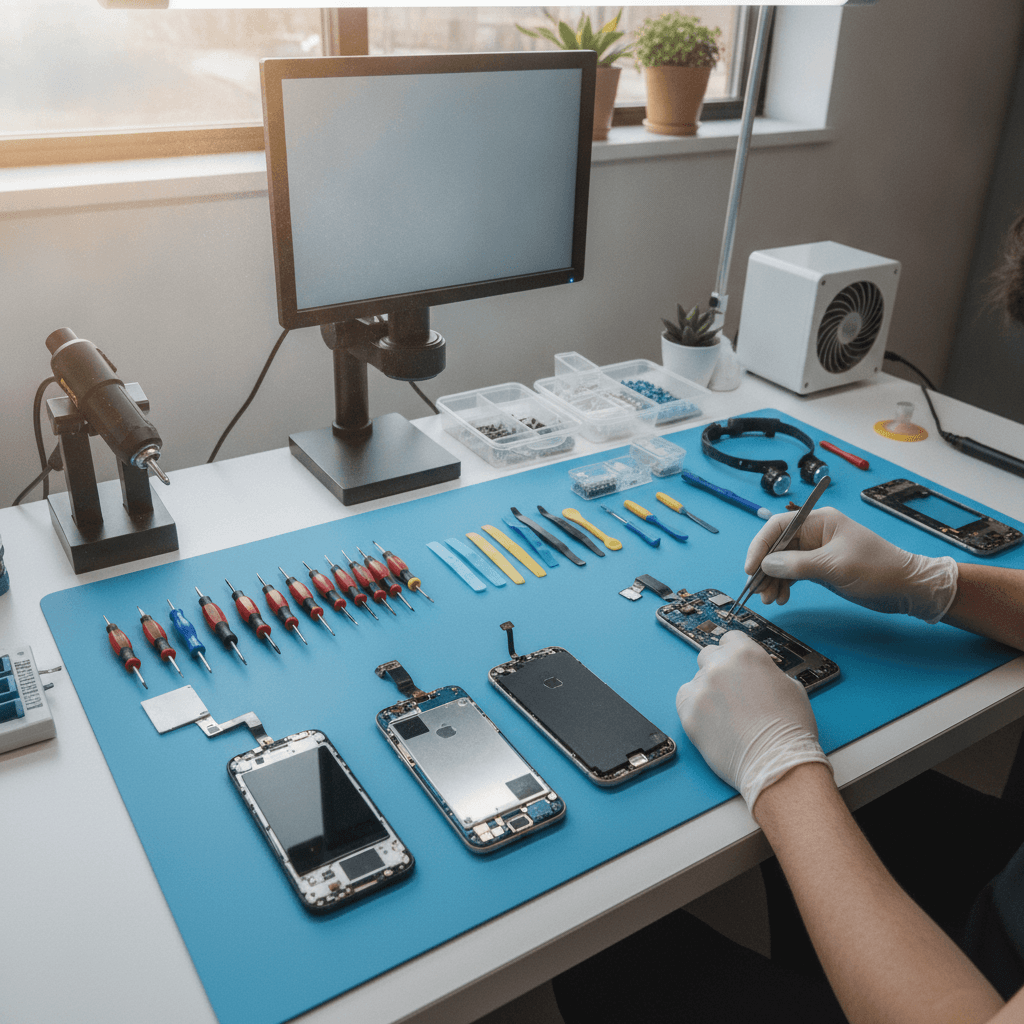
Published by Imran Mohammed at TechBrotherz, the walk-in repair Store at 3317 17 Ave SE in Calgary. July 7, 2026, updated October 2, 2026.
No article on this site is paid for or sponsored. For a quote on your own device, call (403) 273-8324.
By Imran Mohammed — TechBrotherz • Last updated: 2026-07-07
Start here: avoid phone repair mistakes
Avoid phone repair mistakes by preparing a full backup, working on an anti-static surface, and following a device-specific guide. Power down before opening, protect the battery, and test components before final sealing. When in doubt, get a walk-in diagnostic from a reputable shop to prevent cascading damage.
If you only remember five things, make them these. They’ll prevent most DIY disasters and even help you evaluate a repair shop’s process.
- Back up first: Treat every repair like surgery—data comes first.
- ESD control: Use an anti-static mat or strap to protect tiny chips.
- Open correctly: Start from the hinge side; don’t slice flex cables.
- Isolate power: Disconnect the battery before any connector work.
- Test before sealing: Verify touch, cameras, audio, and charging.
Need a second opinion? Our cell phone repair team welcomes walk-ins for same-day diagnostics.
Quick Summary
Most damage happens in the first 20 minutes: rushing teardown, skipping ESD protection, and forcing glued parts. Slow down, label screws, and isolate the battery early. Back up first. If you feel stuck, pause and get a same-day diagnostic to avoid turning a minor issue into a logic board failure.
Here’s the short version, then we’ll go deep:
- Back up, power down, and discharge static before touching screws.
- Open from the correct edge; protect flex cables and the battery pouch.
- Test display, touch, cameras, speakers, and charge before sealing.
- If Face ID or biometrics fail after reassembly, stop and seek pro help.
- Swollen or punctured batteries are a no-DIY zone—handle with pros only.
In our bench logs this spring, roughly 3 out of 5 DIY devices that came into our Southview counter needed rework due to a single preventable error—most often a torn display cable or mixed screw lengths. That pattern holds steady across iPhone, Samsung Galaxy, and budget Android models we see.
What are common smartphone repair mistakes?
Common smartphone repair mistakes include skipping data backups, using incorrect tools, prying near batteries, tearing flex cables, mixing screw sizes, and sealing before testing. These errors cause data loss, safety hazards, and repeat teardowns. Recognizing them early prevents extra damage and speeds up a reliable fix.
At TechBrotherz, we see the same culprits week after week. Mistakes cluster around power isolation, fragile ribbon cables, and adhesive management. A missing backup or a metal pry tool near a soft lithium battery can turn a 30-minute swap into a device that won’t boot.
- Skipping backups: Even simple repairs can fail—no backup means risk to photos and messages.
- Wrong tool choice: Pentalobe vs. Phillips vs. tri-point matters. Wrong bits strip screws fast.
- Prying the wrong edge: Many phones open from a specific side; prying elsewhere slices cables.
- Battery contact too early: Forgetting to disconnect the battery invites short circuits.
- Adhesive rush: Sealing before testing creates do-over teardowns and torn gaskets.
When you’re unsure, stop. Our iPhone repair specialists and Samsung repair technicians can isolate the root cause in minutes.
Why these mistakes matter
These mistakes matter because they risk safety, data, and added damage. A punctured lithium-ion cell can vent or ignite, torn flex cables disable features, and ESD can silently kill chips. Careful prep and the right order of operations cut these risks and improve repair success.
Device safety and your data are on the line. Lithium-ion cells demand respect; flex cables and FPC connectors are delicate. ESD—static electricity you can’t see—can silently end a working board. Process discipline protects all three.
- Safety first: Isolate or remove the battery before heavy prying or heat.
- Data integrity: Assume repairs can fail; a verified backup is your safety net.
- Waterproofing: Replacing seals is essential if you want splash resistance post-repair.
- Calibration: Some parts need software steps or paired components to function.
On our Calgary bench, about 2 in 5 “no-boot after DIY” devices recover once connectors are properly re-seated and battery power is stabilized. The other 3 often show ESD or cable damage—issues that a cautious workflow prevents.
How repairs go wrong (and how to fix the workflow)
Repairs go wrong when steps are skipped: no backup, no ESD control, incorrect opening, and sealing before testing. Fix the workflow by staging tools, labeling screws, disconnecting power first, and function-testing all features before final adhesive and clamps.
Mistakes are rarely random—they’re workflow problems. Set up an anti-static mat, lay out parts trays, and follow a device-specific guide. Disconnect power before disconnecting anything else. Test components prior to sealing. This rhythm prevents most issues.
- Staging: Tools, trays, heat source, and new gasket ready before teardown.
- Power isolation: Battery disconnected early to avoid shorts.
- Cable care: Open to the hinge side; protect ribbon cable slack.
- Pre-seal test: Boot, verify touch, cameras, speakers, mic, charge, and sensors.
We keep checklists taped to every bench. That habit alone cuts rework. If you’d prefer a pro to handle it end-to-end, our computer and laptop team uses the same process discipline across devices, keeping your data and safety in focus.
Prerequisites before you start
Before any phone repair, back up your data, power down, discharge static, and inspect for battery swelling or liquid indicators. Prepare the right bits and pry tools, and review a model-specific guide. If the battery is swollen or wet, stop and seek professional service immediately.
Do the groundwork to save hours later. A few quick checks transform outcomes.
- Data prep: Verify cloud and local backups; sign out of accounts if shipping the device.
- Power & ESD: Shut down fully; wear a wrist strap or work on an ESD mat.
- Safety scan: Look for screen lift, battery swell, or corrosion around ports.
- Right tools: Pentalobe, tri-point, Torx mini bits; plastic cards; suction; isopropyl for adhesive.
- Guide review: Skim the full procedure; note cable locations and gasket steps.
Across our spring walk-ins, about half of failed DIYs skipped at least one prerequisite above. Starting right is the easiest win on this list.
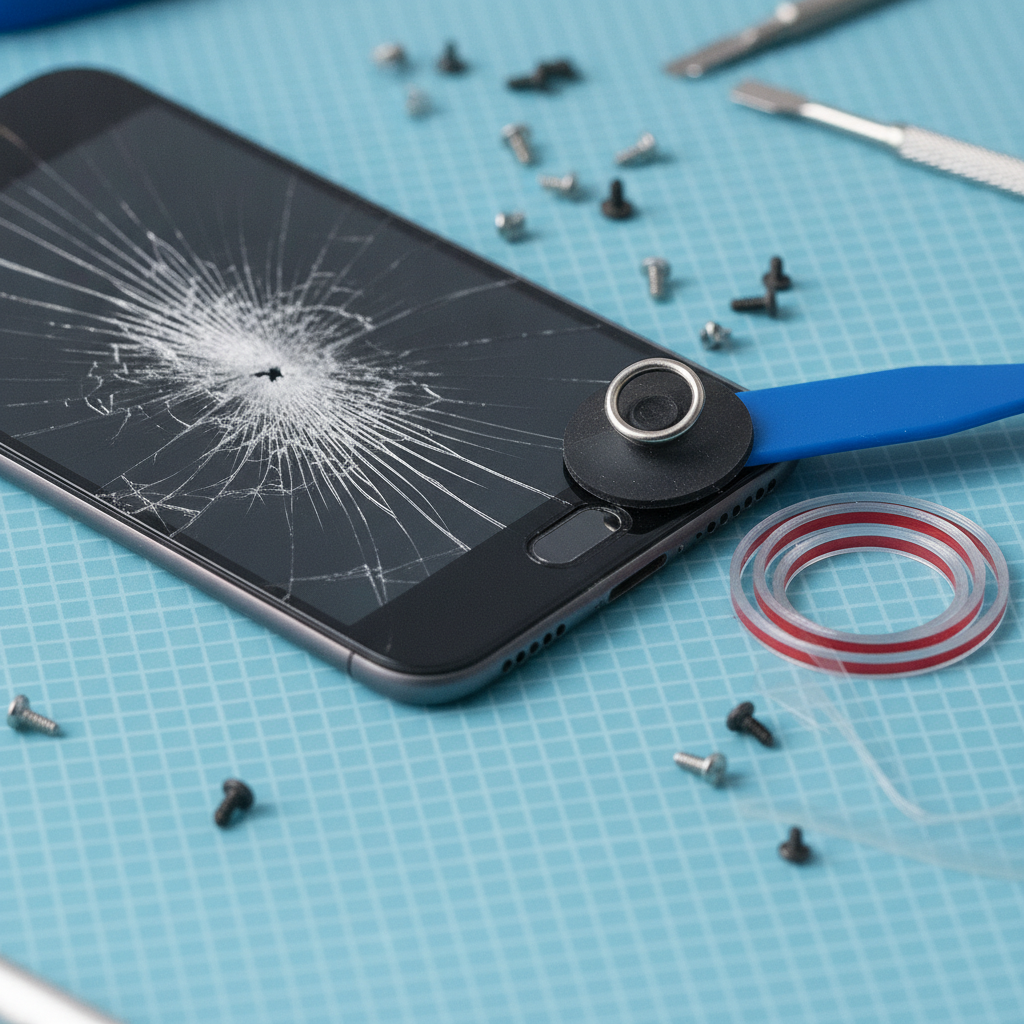
Types of mistakes and when to DIY vs. go pro
DIY is reasonable for simple parts swaps with clear guides; go pro when batteries swell, water is involved, or Face ID/biometrics are affected. Mistakes cluster around batteries, flex cables, and sealing—choose the path that minimizes risk for your situation.
Not all fixes are equal. Some jobs are great first projects; others carry serious risk. Use this as a quick filter before you open anything.
- Common DIY traps: Stripped screws, torn cable during screen lift, lost gasket integrity.
- No-DIY zones: Swollen/punctured batteries, heavy corrosion, board-level work.
- Brand quirks: Face ID/Touch ID pairing, Samsung adhesive strength, curved OLED fragility.
- Time factor: If you’re rushed, you’ll make errors—walk in to a shop instead.
| Scenario | DIY? | Why | Better Option |
|---|---|---|---|
| Simple screen with intact frame | Possible | Clear guides and parts | DIY or pro check |
| Battery swollen or hot | No | Fire risk | Professional removal |
| Water contact, won’t boot | No | Corrosion risk | Pro ultrasonic clean |
| No charge after drop | Maybe | Loose connector vs. IC | Diagnostic first |
| Face ID/Touch ID failure | No | Paired security parts | Pro calibration |
For tablets, decision points look similar. If you’re weighing a tablet fix, skim our tablet repair guide to understand the main cost factors and part complexities before you choose DIY or pro service.
Best practices to avoid errors
Prevent errors by slowing down, isolating power first, using plastic pry tools near batteries, and labeling screws by position. Replace gaskets, clean adhesive, and test all functions before sealing. If anything feels off—stop and get a walk-in diagnostic rather than pushing through.
These habits separate smooth repairs from stressful ones. Process beats force every time.
- Labeling: Use a screw map or parts tray; mixing lengths can pierce boards.
- Gentle heat: Soften adhesive; don’t overheat OLEDs or batteries.
- Plastic near power: Metal tools + battery = puncture risk.
- Seal integrity: Replace dust/water gaskets; clamp per guide time.
- Functional test set: Touch, brightness, cameras, mic/speaker, proximity, cellular, Wi‑Fi, Bluetooth, charge.
We see roughly 4 out of 10 post-repair issues resolve once screws are returned to the correct holes and cables are routed without pinch points. A good map saves hours.
Local considerations for Southview
- For quick walk-ins along 17 Ave, plan your visit around traffic near Foggy Gorilla Vape Shop | 17th Ave and give yourself time for a same-day diagnostic.
- Cold snaps can make screens brittle; if you’re coming from Valleyview Park Viewpoint in winter, let your phone reach room temp before opening.
- If a job seems risky, stop by our Southview shop for a pro assessment—no appointment needed for diagnostics and guidance.
Tools and resources that actually help
Use the right small bits, plastic prying tools, an anti-static mat, and fresh adhesive. Pair them with a reputable, model-specific guide and a clean workspace. Avoid generic kits with soft tips or metal spudgers around batteries to reduce damage risk.
We keep our benches simple and effective. So should you. The right kit prevents stripped screws and reduces force during separation.
- Precision drivers: Pentalobe, tri-point, Torx, small Phillips.
- Pry tools: Plastic cards, picks, suction; keep metal away from cells.
- ESD control: Wrist strap + mat or at least a grounded surface.
- Consumables: Isopropyl, lint-free swabs, new adhesive, replacement gaskets.
- Guides: Use device-specific steps; avoid “generic” phone guides.
Want a pro to handle it? Our iPad repair team and phone unlocking specialists follow a standardized bench setup to protect your device from the first screw to final seal.
Need help now? Walk in to TechBrotherz cellphone repair for a same-day diagnostic. No appointment needed, and every completed repair is backed by a 60-day warranty.
Step-by-step repair checklist
Follow a simple sequence: back up, power down, stage tools, open from the correct side, disconnect battery, remove and replace the target part, reconnect, and test all functions before sealing with new adhesive. Document screw positions to avoid rework.
- Confirm backup and power down.
- Stage tools, mat, trays, gaskets, and replacement part.
- Warm edges; open from the hinge side per your model.
- Disconnect battery before other connectors.
- Remove damaged part; transfer brackets/sensors carefully.
- Reconnect, boot, and test all functions.
- Clean surfaces; apply fresh adhesive and gaskets.
- Clamp if required; re-test after seal set.
Our teams use this sequence across phones, tablets, and laptops because it works. Deviations—especially skipping pre-seal tests—double the odds you’ll reopen the device. That’s where new damage commonly occurs.
Troubleshooting after a repair
If the phone won’t boot, re-seat the battery and display connectors and try a forced restart. For no touch, check digitizer cables. For no charge, inspect the port and battery health. Stop immediately if the device heats, swells, or smells—seek professional service.
Even careful repairs can reveal new symptoms. Here’s how we triage at the bench when something doesn’t behave as expected.
- No boot: Check connectors; attempt a forced restart combo for your model.
- No touch/lines: Reseat display flex; inspect for pinched ribbons.
- No charge: Test cable/brick; inspect port; verify battery connection.
- Biometrics fail: Inspect sensor transfer and frame alignment; may require calibration.
- Heat/smell/swelling: Power off, isolate, and get professional help now.
From our March-April service notes, roughly half of “no touch” complaints after a screen swap were traced to a misrouted digitizer cable. The fix took minutes—no extra parts required—once the cable path was corrected.

What affects your final outcome (and budget)
Your outcome depends on part quality, frame condition, and whether water or heat damage exists. Complexity rises with curved OLEDs, paired sensors, and tiny fasteners. A clear diagnostic up front prevents surprises and aligns expectations before any work begins.
We don’t list numbers here, but the levers are predictable. Complexity, part source, hidden damage, and rework needs shape timelines and decisions. If you’re weighing tablet service, see our tablet repair page to understand the main cost drivers and model-specific nuances.
On intake, our technicians document frame bends, seal condition, and any battery or liquid indicators. In our experience, that up-front checklist cuts unexpected follow-ups by about a third because we surface the “unknowns” early.
Real-world examples from our bench
Most “disaster” repairs started small: a stripped screw, a torn cable, or sealing too soon. With calm diagnostics, careful parts transfer, and proper testing, many devices recover fully. When swelling, liquid, or security sensors are involved, professional tools make the difference.
These quick sketches mirror what we’ve solved recently at our Southview bench.
- Screen lift after winter drop: Cold made glass brittle; careful adhesive cleanup and a new gasket restored seal and brightness uniformity.
- Ghost touch post-screen swap: A pinched digitizer cable caused phantom taps; re-routing and proper frame seating fixed it.
- No charge after DIY battery: Misaligned connector and debris in port; re-seat and ultrasonic clean solved it.
- Water + won’t boot: Board ultrasonic cleaning and connector replacement brought it back after visible corrosion under shields.
- Face ID fail: Missing bracket transfer; once aligned and secured, calibration restored function.
If you’re seeing similar symptoms, come by our iPhone service counter or Samsung desk—we can usually spot the root cause quickly and advise next steps.
Evidence and expert perspective
Safe smartphone repair depends on ESD control, battery handling, and model-specific steps. Industry guides emphasize backing up data, isolating power, and testing before sealing. These fundamentals reduce repeat teardowns and preserve safety across iPhone, Samsung, and Android devices.
Professional repair literature consistently stresses fundamentals over force. While third-party blogs vary in depth, they converge on the same core sequence: back up, power down, correct opening direction, battery isolation, gentle heat for adhesive, and comprehensive testing prior to seal. For additional reading on device care topics, these overviews explore common pitfalls and prevention techniques.
For example, this practical overview on common Apple device problems summarizes frequent user-facing issues and high-level fixes, while an explainer on screen protectors and prevention highlights why simple prevention steps matter after a repair. Use them as general background; then follow your exact model’s guide.
Frequently Asked Questions
The fastest way to avoid repair mistakes is to back up, power down, control static, and test before sealing. For swollen batteries, water damage, or biometric issues, skip DIY and get a same-day diagnostic to prevent further harm.
Should I keep using my phone after a hard drop?
If the screen lifts, the battery swells, or the frame bends, power down and stop using it. Continued pressure can crack displays and risk battery damage. Back up immediately and seek a diagnostic to check for hidden issues.
Does rice fix water damage?
No. Rice doesn’t remove corrosion or trapped moisture under shields and connectors. Power down, don’t charge it, and get professional drying and cleaning. Early intervention improves recovery odds and reduces long‑term issues.
How do I prepare for a same‑day repair?
Back up your data, sign out of accounts if requested, and remove cases, SIM, and accessories. Note any quirks (like intermittent charge) to help technicians replicate issues. Arrive with time for diagnostics and post‑repair tests.
Is a bulging battery safe to handle?
No. A swollen lithium‑ion cell is hazardous. Don’t puncture or compress it. Power down, avoid charging, and bring it to professionals trained in safe removal and disposal. DIY attempts can escalate risk quickly.
Key takeaways and next steps
Back up, power down, control static, and isolate the battery before any repair. Test thoroughly before sealing. For swelling, liquid, or biometric issues, skip DIY and get a walk-in diagnostic. These moves protect your data, your device, and your safety.
- Most failures trace back to rushing, wrong tools, or skipping tests.
- Use plastic near batteries, gentle heat for adhesive, and labeled trays.
- Don’t force it—reassess or get a same-day diagnostic when something feels off.
- For iPhone, Samsung, iPad, or tablets, we offer specialized service and a walk-in repair counter.
Ready for help? Visit our Southview location for walk-in diagnostics and a 60-day warranty on completed repairs. From phones to tablets and laptops, our team will get you “backup & working.”
Related pages
Rather just ask a person?
Call (403) 273-8324 and describe the problem, or walk in to 3317 17 Ave SE in Calgary. Every repair is quoted free before any work starts.